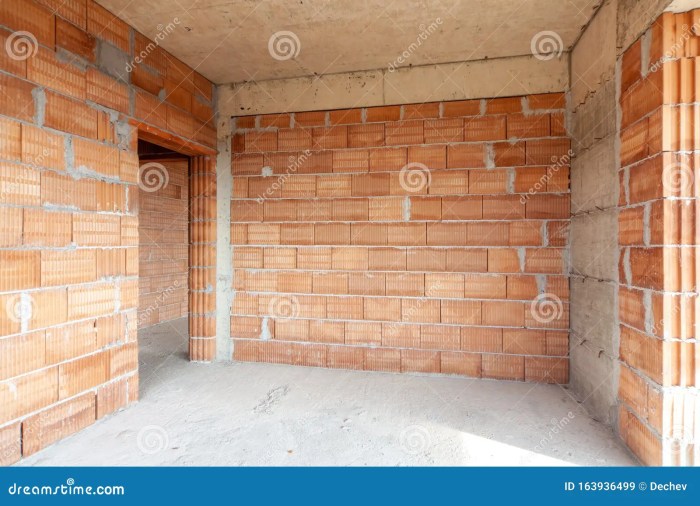
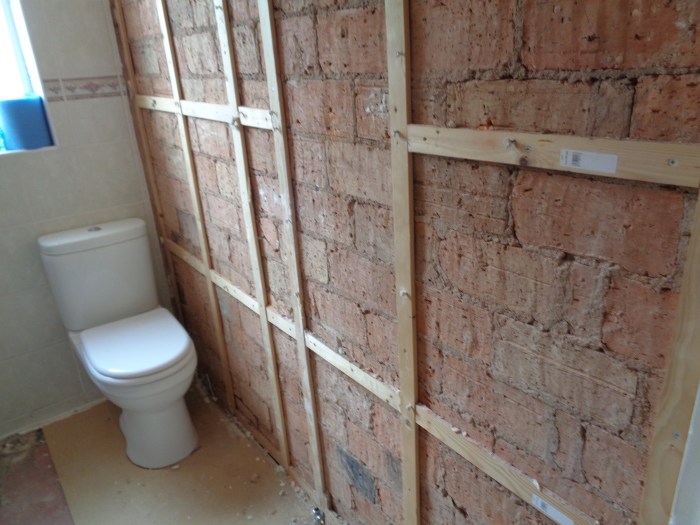
Imagine a space where raw industrial aesthetics meet the soothing sanctuary of a bathroom. The unfinished charm of exposed brick walls presents a unique design challenge and opportunity. This exploration delves into transforming this seemingly austere canvas into a functional and stylish haven, balancing the rustic texture of brick with carefully selected materials and a thoughtfully planned layout. We’ll navigate the complexities of waterproofing, lighting schemes, and space optimization to reveal the potential hidden within an unfinished bathroom featuring exposed brick walls.
From choosing the right flooring to strategically placing plumbing fixtures, every decision contributes to the overall ambiance. We will examine diverse design styles – from minimalist modern to rustic farmhouse and industrial chic – showcasing how each aesthetic can complement the inherent character of exposed brick. The science of light and shadow, the interplay of textures, and the practical considerations of humidity control will all play crucial roles in bringing this vision to life.
The journey involves understanding the properties of different materials, mastering waterproofing techniques, and harnessing the power of light to create a space that is both beautiful and functional.
Design Inspiration & Aesthetics
The exposed brick walls of an unfinished bathroom present a unique design challenge and opportunity. Their inherent texture and history offer a strong foundation for various aesthetic approaches, allowing for both rustic charm and modern sophistication. Careful consideration of color palettes, lighting, and textural contrasts is crucial to create a cohesive and visually appealing space.
Design Styles for Exposed Brick Bathrooms
Three distinct design styles can effectively complement exposed brick walls in a bathroom setting: industrial, rustic, and minimalist. The industrial style emphasizes raw materials and functional design elements, celebrating the inherent beauty of unfinished surfaces. The rustic style incorporates natural materials and warm tones to create a cozy and inviting atmosphere. Finally, the minimalist style uses clean lines, neutral colors, and a focus on essential elements to create a serene and uncluttered space.
Each style offers a different approach to integrating the exposed brick into the overall design concept.
Color Palettes for Exposed Brick Bathrooms
The color palette plays a crucial role in setting the mood and style of the bathroom. Exposed brick, depending on its color, can range from warm reds and oranges to cool grays and browns. For warmer brick tones, a palette featuring muted greens, blues, and creams can create a calming and balanced aesthetic. Think sage green accents, soft blue towels, and creamy white fixtures.
Cooler toned brick benefits from a palette incorporating warm metallics like bronze or brass, alongside shades of charcoal gray and deep navy. This contrast creates visual interest and prevents the space from feeling cold. Neutral palettes, using shades of white, gray, and beige, can also work effectively, allowing the brick to serve as a focal point. The key is to choose colors that complement, rather than compete with, the existing brick tones.
Lighting Design to Enhance Exposed Brick
Strategic lighting is paramount to highlight the texture and character of the exposed brick. A mood board visualizing this would feature a combination of lighting types. Recessed lighting, strategically placed above and around the brick walls, provides even illumination, preventing shadows and showcasing the brick’s detail. Accent lighting, such as strategically placed spotlights or wall sconces, can be used to draw attention to specific areas or features within the brickwork, creating visual depth.
Furthermore, incorporating soft, ambient lighting, perhaps from a chandelier or pendant light, adds warmth and creates a relaxing atmosphere. The interplay of these different lighting types enhances the overall aesthetic appeal of the space, transforming the exposed brick from a mere structural element into a striking design feature. For instance, a dramatic spotlight illuminating a particularly interesting section of the brickwork could add a focal point of interest.
Textural Contrasts and Complements with Exposed Brick
The raw texture of exposed brick benefits from carefully chosen textural contrasts. Warm, natural wood elements, such as a vanity made from reclaimed wood or wooden shelving, can introduce a sense of rustic charm and warmth. The smooth, cool surfaces of stone, such as a marble countertop or a stone floor, offer a sophisticated counterpoint to the brick’s rough texture.
Metal accents, particularly in finishes like brushed nickel or matte black, add a modern touch and a visual contrast to the earthy tones of the brick. These textural variations prevent the bathroom from feeling monotonous and add visual interest, layering depth and complexity into the design. The contrast between the rough brick and the smooth stone, for instance, creates a dynamic and visually engaging space.
Functionality & Layout
The successful integration of exposed brick walls into a bathroom necessitates careful consideration of functionality and spatial layout. Optimizing the space requires balancing aesthetic appeal with practical considerations, such as plumbing accessibility, storage capacity, and ease of movement. The unique texture and visual weight of the brick demand a design that complements, rather than clashes with, its inherent character.
Bathroom Layout Options
Three distinct bathroom layouts are presented below, each designed to effectively utilize the exposed brick walls. These designs consider factors such as traffic flow, fixture placement, and storage optimization. The choice of layout will depend on the specific dimensions and shape of the bathroom space.
| Layout | Pros | Cons | Considerations |
|---|---|---|---|
| Linear Layout (Fixtures arranged along one wall) | Maximizes space, creates a clean aesthetic, showcases brick wall as a focal point. | May feel cramped if the space is narrow, less privacy for toilet. | Ideal for long, narrow bathrooms. Requires careful placement of fixtures to maintain comfortable spacing. |
| L-Shaped Layout (Fixtures arranged along two adjacent walls) | Creates distinct zones for showering, washing, and toileting, allows for more storage solutions. | Can feel disjointed if not carefully planned, may require more plumbing work. | Suitable for square or rectangular bathrooms. Careful consideration of corner placement of fixtures is crucial. |
| U-Shaped Layout (Fixtures arranged along three walls) | Provides ample counter space, excellent for larger bathrooms, maximizes storage opportunities. | Can feel overwhelming in smaller spaces, requires significant plumbing work. | Only suitable for large bathrooms. Requires precise planning to avoid a cramped feel. |
Plumbing Fixture Placement
The placement of plumbing fixtures, including the sink, toilet, and shower, should be carefully considered in relation to the exposed brick walls. For example, placing the sink against a brick wall can create a visually striking feature, while strategically placing the toilet to minimize its visual impact. Plumbing access points must be considered to minimize disruption to the brickwork.
Local plumbing codes must be strictly adhered to for safe and efficient operation.
Correct placement minimizes disruption to the brickwork and optimizes water flow.
Storage Solutions
Maximizing storage within a bathroom with exposed brick walls requires creative solutions that complement the existing aesthetic. Recessed shelving within the brickwork itself can provide discreet storage without compromising the visual integrity of the walls. Floating vanities or wall-mounted cabinets can also offer ample storage without overwhelming the space. The use of open shelving, combined with stylish baskets or containers, can further enhance the rustic charm of the exposed brick.
Essential Bathroom Features
A functional and stylish unfinished bathroom requires a thoughtful selection of essential features. These include adequate lighting to illuminate the space and highlight the brickwork, efficient ventilation to prevent moisture buildup, and durable, water-resistant materials that can withstand the humid environment. Consider incorporating underfloor heating for added comfort, particularly in colder climates. A well-designed layout, incorporating the aforementioned storage solutions, is paramount to creating a space that is both aesthetically pleasing and practically functional.
Material Selection & Finishes
The exposed brick provides a strong textural and visual foundation for this bathroom renovation. Material choices for flooring, countertops, and sealant must complement this rustic aesthetic while also withstanding the unique challenges of a high-humidity environment. Careful consideration of durability, water resistance, and aesthetic compatibility is crucial for a successful and long-lasting result.
Bathroom Flooring Options for Exposed Brick Walls
The choice of bathroom flooring should balance durability, water resistance, and aesthetic harmony with the exposed brick. Several options offer excellent performance in high-humidity environments. Porcelain tile, known for its imperviousness to water and its resistance to staining and scratching, offers a wide range of colors and textures, many of which can complement the earthy tones of exposed brick.
Large-format porcelain tiles can create a modern, minimalist feel, while smaller mosaic tiles can add visual interest. Alternatively, natural stone, such as slate or travertine, provides a more organic and textured look, aligning well with the rustic charm of exposed brick. However, natural stone requires more diligent sealing to prevent water damage. Finally, engineered wood flooring, while not as water-resistant as tile, can be used with appropriate waterproofing techniques and provides a warmer, more comfortable underfoot feel.
Careful selection of a sealant designed for high-humidity environments is critical for longevity in any wood flooring application.
Sealant and Waterproofing Techniques for Exposed Brick
Protecting exposed brick in a bathroom from moisture is paramount to prevent damage and mold growth. A high-quality sealant is essential. Penetrating sealers are ideal for exposed brick as they soak into the pores of the brick, protecting it from within. These sealers typically consist of siloxane polymers which create a hydrophobic barrier, repelling water while allowing the brick to breathe.
Before application, the brick should be thoroughly cleaned and dried. Two coats of sealant, allowing ample drying time between applications, are generally recommended. For additional waterproofing, a waterproof membrane can be applied behind the brick, particularly in areas prone to splashing, such as the shower enclosure. This membrane provides an extra layer of protection, preventing water from seeping behind the brick and causing damage to the underlying structure.
Materials List for Bathroom Completion
The following list provides a detailed breakdown of materials needed, including quantities, which are estimates based on a standard-sized bathroom (approximately 8ft x 5ft):
| Material | Quantity | Specifications |
|---|---|---|
| Porcelain Tiles (Flooring) | 50 sq ft | 12″ x 24″, matte finish, suitable for wet areas |
| Tile Adhesive | 5 gallons | Modified thin-set mortar, suitable for porcelain tile |
| Grout | 5 lbs | Epoxy grout, water-resistant, color to match tiles |
| Penetrating Brick Sealer | 2 gallons | Siloxane-based, water repellent |
| Waterproof Membrane | 50 sq ft | PVC or similar, suitable for shower areas |
| Countertop Material (Quartz) | 25 sq ft | White or light gray quartz, to complement brick |
| Bathroom Sink | 1 | Undermount sink, ceramic or porcelain |
| Faucet | 1 | Matching sink style and finish |
| Toilet | 1 | Two-piece toilet, white |
| Lighting Fixtures | 3 | Recessed lighting or vanity lights |
Note: These quantities are estimates and may need adjustment based on the specific dimensions of the bathroom and design choices.
Countertop Materials Complementing Exposed Brick
Three countertop materials that visually complement exposed brick are quartz, concrete, and butcher block. Quartz countertops offer a wide range of colors and patterns, with options ranging from light neutrals that create a bright and airy feel to darker shades that add depth and contrast to the rustic brick. Concrete countertops provide a modern industrial aesthetic, complementing the raw texture of exposed brick.
The inherent variations in color and texture of concrete can add a unique character to the bathroom. Butcher block countertops, made from hardwood, introduce warmth and natural beauty, creating a striking contrast with the brick while maintaining a cohesive rustic style. Each material offers different levels of durability and maintenance requirements, with quartz being the most low-maintenance option.
Lighting & Ambiance

The interplay of light and shadow is paramount in shaping the atmosphere of a bathroom, particularly one featuring exposed brick. Careful lighting design can accentuate the texture and warmth of the brick while ensuring sufficient illumination for functionality. A multi-layered approach, combining ambient, task, and accent lighting, is key to achieving the desired effect.
Effective lighting in a bathroom with exposed brick walls requires a thoughtful strategy that considers both the aesthetic appeal and practical needs of the space. Natural light should be maximized, and artificial lighting should complement this, enhancing the textures and colors of the brick while providing sufficient illumination for all bathroom activities. The color temperature of the lighting will also significantly impact the perceived warmth and ambiance of the room.
Strategic mirror placement will further amplify the sense of space and brightness.
Lighting Plan for Exposed Brick Walls
A well-designed lighting plan will use a combination of fixture types and placement to highlight the brick’s texture and provide ample illumination. Recessed lighting, strategically placed above and around the brick walls, provides even ambient light, minimizing harsh shadows. Wall-mounted sconces, positioned to graze the brick surface, will accentuate its texture and depth. These can be chosen with adjustable heads to fine-tune the light angle for optimal effect.
Finally, a vanity light fixture, preferably with a soft, diffused light source, provides task lighting for grooming and makeup application. This layered approach ensures that the bathroom is adequately lit for all its functions, while simultaneously enhancing the aesthetic appeal of the exposed brick.
Utilizing Natural Light
Maximizing natural light is crucial in enhancing the bathroom’s atmosphere. Large windows, if available, should be left unobstructed. Sheer curtains or blinds can be used to diffuse harsh sunlight while still allowing ample light to enter. Light-colored paint on walls and ceilings will reflect natural light, further brightening the space. The strategic placement of mirrors near windows can amplify the natural light, creating a brighter and more spacious feeling.
This natural light enhances the warm tones of the brick, giving the space a naturally inviting ambiance. For example, a bathroom with a south-facing window will benefit from ample natural light throughout the day, while north-facing windows may require supplementary artificial lighting.
Impact of Lighting Temperature on Brick Perception
The color temperature of the light source significantly affects the perceived color and warmth of the exposed brick. Warm-white light (2700-3000K) enhances the reddish tones of the brick, creating a cozy and inviting atmosphere. This is particularly effective in smaller bathrooms, making them feel more intimate and welcoming. Cool-white light (5000-6500K), on the other hand, can make the brick appear more muted and even slightly grayish, potentially making the space feel colder and less inviting.
Neutral-white light (3500-4100K) offers a balance, showcasing the brick’s natural color without significantly altering its perceived warmth. The choice of color temperature depends on the desired ambiance and the overall design aesthetic of the bathroom.
Strategic Mirror Placement for Enhanced Space and Light
Mirrors are invaluable tools for maximizing the feeling of space and light in a bathroom. A large mirror placed opposite a window will reflect natural light deep into the room, effectively doubling its brightness. Smaller mirrors strategically placed near light sources can further amplify the light, creating a brighter and more open feeling. The size and shape of the mirrors should be chosen to complement the overall design aesthetic of the bathroom, while also maximizing their light-reflecting properties.
For instance, a large rectangular mirror placed above the vanity will not only provide ample reflection for grooming but also visually expand the space. Smaller, decorative mirrors can be used to add visual interest and further amplify the light in specific areas.
Visual Representation

The following sections detail visual representations of completed bathroom designs incorporating exposed brick walls, focusing on color palettes, textural contrasts, and lighting schemes. We will explore two distinct aesthetic approaches, highlighting the impact of strategic plant placement and decorative elements.
Design One: Industrial Chic with Warm Accents
Imagine a bathroom bathed in soft, warm light. The exposed brick walls, a rich, deep red-brown hue, are the focal point. The bricks themselves show subtle variations in color and texture, a testament to their age and history. These are offset by the cool, smooth surface of a large, freestanding bathtub, crafted from white porcelain. The flooring is a dark gray, polished concrete, providing a stark contrast to the brick and adding to the industrial aesthetic.
Recessed lighting above the vanity and strategically placed sconces flanking the mirror provide ample illumination, minimizing harsh shadows and highlighting the textural interplay. Black metal fixtures, including the faucet and towel rack, complete the industrial feel, while plush, dark gray towels introduce a touch of luxury. A large, leafy fern placed in a simple ceramic pot sits on the vanity, softening the stark lines of the design.
Design Two: Rustic Farmhouse with Natural Light
In contrast to the first design, this bathroom evokes a sense of rustic charm. The exposed brick walls, painted a soft, creamy white, retain their texture but are softened by the light color. The overall palette is light and airy, utilizing natural materials like light oak for the vanity and shelving. The flooring is a light-colored, wide-plank wood, complementing the warm tones of the wood furniture.
Large windows allow abundant natural light to flood the space, further enhancing the airy feeling. A vintage-style, pedestal sink adds to the farmhouse aesthetic. The lighting is predominantly natural, supplemented by soft, warm-toned LED bulbs in pendant lights above the vanity and a subtle uplight illuminating the brick wall, highlighting its texture without creating harsh shadows. Here, the plants play a more significant role: trailing pothos cascade from shelves, while a collection of succulents in terracotta pots adds pops of color and texture, mirroring the natural tones of the wood and brick.
Plant and Decorative Element Integration
The strategic use of plants and decorative elements significantly impacts the overall aesthetic and functionality. Plants, such as the aforementioned ferns and pothos, not only add visual interest but also contribute to improved air quality. Studies have shown that certain plants can remove volatile organic compounds (VOCs) from the air, improving indoor air quality. In both designs, the plants complement the overall color scheme and enhance the textural diversity, creating a more inviting and visually appealing space.
In the industrial-chic design, the single fern adds a touch of life to the otherwise austere palette. In the rustic farmhouse design, the abundance of plants creates a more natural and organic feel, seamlessly blending with the materials and overall aesthetic. Additional decorative elements, such as framed artwork, mirrors, and carefully selected bath accessories, can further enhance the visual appeal and personal style of the space, allowing for customization and individual expression.
For example, a collection of vintage apothecary jars could enhance the rustic farmhouse design, while industrial-style metal shelves could further accentuate the industrial chic theme.
Closing Notes
Ultimately, transforming an unfinished bathroom with exposed brick walls into a stunning retreat hinges on a holistic approach. It’s about marrying practicality with aesthetics, understanding the interplay of materials and light, and carefully considering the functionality of the space. By thoughtfully selecting finishes, optimizing the layout, and implementing effective waterproofing, the raw, industrial charm of exposed brick can be elevated into a sophisticated and inviting bathroom design.
The result? A space that is not just functional, but a testament to the creative potential found in embracing the unexpected.
FAQ Resource
Can I paint exposed brick in a bathroom?
While possible, painting diminishes the unique texture and character of exposed brick. Consider a sealant to protect the brick and enhance its natural beauty instead. If painting is desired, use a moisture-resistant, breathable paint designed for high-humidity environments.
How do I prevent mold and mildew on exposed brick in a bathroom?
Proper ventilation is crucial. Install an exhaust fan and ensure adequate airflow. Apply a high-quality sealant specifically designed for brick in wet areas to prevent moisture penetration. Regular cleaning with a mild solution of bleach and water can also help prevent mold growth.
What are some cost-effective ways to add storage to a small bathroom with exposed brick?
Utilize the vertical space by installing floating shelves or narrow wall-mounted cabinets. Repurpose old crates or baskets for storage, playing on the rustic aesthetic. Consider a slim, mirrored cabinet to maximize space and light reflection.
Are there any specific safety concerns with exposed brick in a bathroom?
Ensure the brick is properly sealed to prevent moisture damage and the growth of mold and mildew. Check for any sharp edges or protrusions that could pose a safety hazard and address them accordingly. Always prioritize adequate ventilation to prevent slips from water accumulation.
Leave a Reply