The raw, industrial aesthetic of unfinished concrete walls offers a unique canvas for bathroom design. This seemingly austere material, however, presents both exciting opportunities and significant challenges. From carefully selecting waterproofing membranes to creatively integrating plumbing fixtures, transforming an unfinished concrete space into a functional and stylish bathroom requires a blend of artistic vision and meticulous craftsmanship. This guide delves into the intricacies of this transformation, exploring design considerations, practical finishing techniques, plumbing integration, and the associated costs.
We will explore diverse design styles, from rustic charm to sleek contemporary minimalism, highlighting the crucial role of lighting, flooring, and fixture choices in shaping the overall ambiance. The practical aspects of preparing concrete surfaces for various finishes, including sealing, painting, and staining, will be meticulously detailed. Furthermore, we will examine effective moisture control strategies and delve into the intricacies of plumbing integration within the concrete structure, addressing potential challenges and offering creative solutions for a seamless and aesthetically pleasing outcome.
Design Considerations for Unfinished Concrete Bathroom Walls
The inherent beauty and textural depth of unfinished concrete walls offer a unique canvas for bathroom design. However, successfully integrating this material requires careful consideration of its properties and potential challenges, particularly regarding moisture management and aesthetic cohesion. The following sections detail design strategies for maximizing the aesthetic and functional potential of a concrete bathroom.
Modern Minimalist Bathroom Design with Exposed Concrete Walls
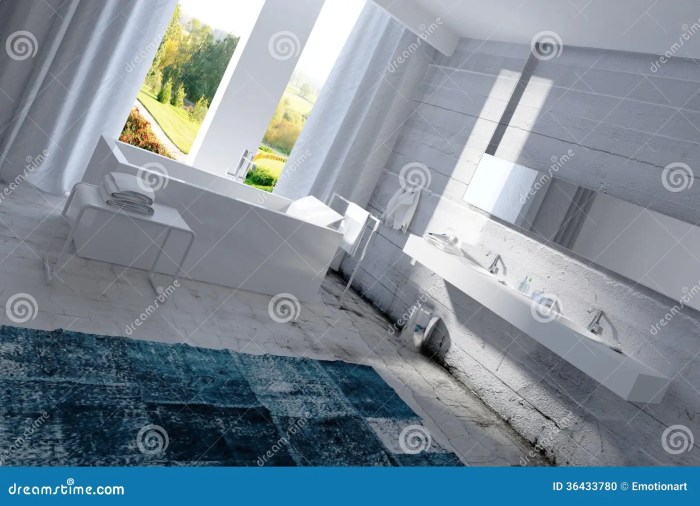
A modern minimalist bathroom featuring exposed concrete walls prioritizes clean lines, neutral tones, and a sense of spaciousness. The raw texture of the concrete is complemented by sleek, minimalist fixtures. For flooring, large-format porcelain tiles in a light gray or off-white would create a visually appealing contrast while maintaining a cohesive aesthetic. Fixtures should be chosen in brushed nickel or matte black to avoid visual clutter.
A floating vanity with integrated sink and a frameless glass shower enclosure would further enhance the minimalist feel. The overall color palette should be restricted to shades of gray, white, and black, with subtle accents of wood or natural stone to add warmth.
Lighting Schemes for Concrete Bathroom Walls
Effective lighting is crucial in a concrete bathroom to counteract the potential for a cold, harsh atmosphere. A layered approach, combining natural and artificial light sources, is recommended. Natural light, maximized through large windows or skylights, should be the primary source. This is complemented by strategically placed artificial lighting. Recessed lighting in the ceiling provides general illumination, while task lighting, such as vanity lights with adjustable brightness, illuminates the mirror area.
Accent lighting, using LED strip lights or wall sconces, can highlight architectural features or artwork, adding depth and warmth to the space. A mood board might showcase a scheme with soft white recessed lighting, warm-toned LED strips behind a floating vanity, and a sleek, adjustable vanity light fixture. Another scheme could emphasize the raw texture of the concrete with dramatic backlighting and strategically placed spotlights.
Design Styles for Unfinished Concrete Bathrooms
Three distinct design styles can be achieved with unfinished concrete walls:
Rustic Style: This style embraces the raw, unfinished texture of the concrete, pairing it with natural materials like reclaimed wood and woven textiles. Fixtures would be chosen in aged brass or bronze finishes. A color palette of warm browns, creams, and muted greens creates a cozy, inviting atmosphere. Imagine a freestanding bathtub made of cast iron with claw feet, paired with a rustic wooden vanity and woven baskets for storage.
Industrial Style: This style emphasizes the industrial aesthetic of exposed concrete with metallic accents and functional elements. Metal pipes, exposed ductwork, and vintage-inspired fixtures are key features. The color palette typically includes grays, blacks, and metallics. A sleek, metal vanity with exposed plumbing and industrial-style pendant lighting would be central to this design. The use of exposed brick or metal shelving adds to the overall aesthetic.
Contemporary Style: This approach uses the concrete as a neutral backdrop for clean lines and minimalist design. The concrete’s texture provides visual interest, while sleek, modern fixtures and a neutral color palette maintain a sophisticated aesthetic. A floating vanity with a seamless countertop and minimalist faucets, along with large-format tiles, complete this look. The color scheme might include shades of gray, white, and black, with subtle pops of color from artwork or accessories.
Comparison of Concrete Wall Finishes
The choice of finish significantly impacts the concrete’s appearance, durability, and maintenance.
| Finish | Pros | Cons | Suitability |
|---|---|---|---|
| Sealed | Protects against moisture, enhances durability, maintains natural texture | Requires regular resealing, can darken the concrete slightly | High-moisture areas like showers, ideal for maintaining the natural look |
| Painted | Offers a wide range of color options, hides imperfections, easy to clean | Can chip or peel over time, requires surface preparation, hides natural texture | Areas requiring specific color schemes or where imperfections need concealing |
| Stained | Enhances the natural texture, offers a variety of color tones, relatively easy to maintain | Can be more challenging to apply evenly, may require sealing for moisture protection | Bathrooms where the concrete’s texture is a key design element, balancing aesthetics and practicality |
Practical Aspects of Finishing Concrete Bathroom Walls
Transforming unfinished concrete bathroom walls into a functional and aesthetically pleasing space requires careful planning and execution. The porous nature of concrete necessitates a robust approach to waterproofing and surface preparation to prevent moisture damage and mold growth, crucial for maintaining a healthy and durable bathroom environment. This section details the practical steps involved in achieving a finished concrete wall suitable for a bathroom.
Concrete Wall Preparation for Painting or Sealing
Preparing concrete walls for painting or sealing involves several crucial steps to ensure proper adhesion and longevity of the finish. First, the surface must be thoroughly cleaned to remove dust, debris, and any existing coatings. A pressure washer can effectively remove loose material, followed by a scrub with a stiff brush and a suitable cleaning agent to eliminate grease and grime.
Allow the walls to dry completely before proceeding. Next, any cracks or imperfections should be repaired using a high-quality concrete patching compound. Once the patching compound has cured, sand the repaired areas smooth to create a uniform surface. Finally, application of a concrete primer is vital. A penetrating primer seals the porous concrete, preventing moisture absorption and promoting better paint or sealant adhesion.
The choice of primer depends on the final finish; some primers are designed specifically for use under paint, while others are formulated for sealants. Multiple coats may be necessary for optimal results, allowing each coat to dry completely before applying the next.
Waterproofing Membrane Installation on Concrete Bathroom Walls
Effective waterproofing is paramount in a bathroom environment. A waterproofing membrane acts as a barrier, preventing moisture from penetrating the concrete and causing damage. The process begins with thorough cleaning and preparation of the concrete surface, as detailed in the previous section. Next, a primer specifically designed for waterproofing membranes should be applied to enhance adhesion. Once the primer has dried, the chosen membrane is installed according to the manufacturer’s instructions.
Liquid-applied membranes are often applied with a roller or brush, ensuring even coverage and overlapping seams. Sheet membranes, such as those made of polyethylene or PVC, are carefully laid, overlapping seams and sealing them with appropriate tape or sealant. All penetrations, such as pipes and fixtures, must be carefully sealed to prevent water leakage. After the membrane has cured, a final coat of sealant or primer may be applied to further enhance protection and provide a suitable surface for tiling or painting.
Comparison of Waterproofing Methods for Concrete Bathroom Walls
Several methods exist for waterproofing concrete bathroom walls, each with its advantages and disadvantages. The selection depends on factors such as budget, complexity of the project, and the level of protection required.
- Liquid-applied membranes: These are easy to apply, offering good flexibility and conforming well to irregular surfaces. They provide a seamless waterproof barrier, but require careful application to avoid pinholes and ensure complete coverage. Common examples include polyurethane and epoxy-based membranes.
- Sheet membranes: These are pre-fabricated sheets of waterproof material, typically polyethylene or PVC, which are installed and sealed at the seams. They are relatively easy to install but may be less adaptable to complex shapes. Careful attention to seam sealing is critical.
- Cement-based waterproofing systems: These are applied as a slurry or coating, offering good durability and resistance to alkali. However, they may be less flexible than liquid-applied membranes and require meticulous preparation of the substrate.
Challenges of Working with Concrete Walls in Bathrooms: Moisture Control and Mold Prevention
Concrete, being a porous material, is susceptible to moisture absorption. In the humid environment of a bathroom, this can lead to significant problems. Moisture trapped within the concrete walls can create an ideal breeding ground for mold and mildew, impacting both the structural integrity of the walls and the health of the occupants. Effective moisture control is therefore critical.
This involves proper waterproofing as described above, along with adequate ventilation. Exhaust fans should be installed and used regularly to remove moisture-laden air. Good air circulation helps prevent condensation and reduces the risk of mold growth. Regular cleaning and the use of mold-resistant paints and sealants can further mitigate the risk. In cases of existing moisture damage, remediation may be necessary, involving drying out the affected areas and addressing the source of the moisture problem.
For example, leaking pipes must be repaired immediately. Failing to address these issues can lead to costly repairs in the future.
Plumbing and Fixture Integration in a Concrete Bathroom

The inherent density and permanence of concrete walls present unique challenges and opportunities when integrating plumbing fixtures. Careful planning during the design phase is crucial to ensure both functionality and aesthetic appeal, minimizing disruptions and maximizing space efficiency within the often-limited confines of a bathroom. This section will explore practical strategies for integrating plumbing and fixtures into a concrete bathroom environment, focusing on accessibility, space optimization, and creative concealment techniques.
A well-designed concrete bathroom layout prioritizes accessibility and ease of use. For instance, positioning the toilet, sink, and shower in a linear sequence minimizes movement and accommodates users with mobility challenges. Furthermore, adhering to ADA (Americans with Disabilities Act) guidelines regarding fixture heights and clearances ensures universal accessibility. In smaller spaces, a corner shower or a wall-hung toilet can significantly enhance space efficiency, preventing a cramped feel.
Concealing Plumbing Pipes and Fittings within Concrete Walls
Concealing plumbing within concrete walls offers a clean, uncluttered aesthetic. This is achieved primarily through pre-planning. Before pouring the concrete, carefully routed channels are created using formwork. These channels accommodate pipes and fittings, which are then secured within the channels before the concrete is poured. The channels are typically larger than the pipes to allow for thermal expansion and future maintenance access.
After the concrete sets, access panels, strategically located behind easily removable fixtures like medicine cabinets or wall tiles, can be installed to provide access to pipes for repairs or maintenance. Alternatively, using flexible, PEX piping allows for more maneuverability during installation and minimizes the need for extensive channeling.
Recessed Medicine Cabinet Installation in a Concrete Wall
Installing a recessed medicine cabinet in a concrete wall requires precision and specialized tools. First, a recess is carefully carved into the wall using a rotary hammer and masonry bits. The size and depth of the recess must precisely match the dimensions of the medicine cabinet. Electrical wiring for interior lighting (if applicable) must be pre-installed and protected.
The cabinet is then secured within the recess using construction adhesive and mechanical fasteners, such as concrete screws. Finally, the gap between the cabinet and the wall is sealed using a waterproof caulk to prevent moisture intrusion. The surrounding wall is then finished, either with tiling or painting, ensuring a seamless integration of the cabinet.
Walk-in Shower Installation with a Concrete Wall Enclosure
Constructing a walk-in shower with a concrete wall enclosure demands meticulous attention to waterproofing. The concrete walls are first treated with a waterproof membrane, such as a liquid-applied waterproofing system or a sheet membrane, to prevent water penetration. This membrane is applied to all surfaces within the shower enclosure, extending several inches beyond the shower area onto the adjacent floor.
The shower pan, constructed of waterproof materials like pre-fabricated shower bases or poured concrete with a waterproof liner, is then installed. Ceramic tiles, known for their durability and water resistance, are affixed to the concrete walls and floor using a suitable adhesive. Grout, also waterproof, fills the gaps between the tiles. Finally, the shower fittings, such as the showerhead and valve, are installed, ensuring proper sealing to prevent leaks.
The entire process necessitates adherence to strict building codes and best practices to ensure a long-lasting, watertight shower enclosure.
Cost and Material Considerations

Transforming an unfinished concrete bathroom into a functional and aesthetically pleasing space requires careful consideration of material and labor costs. The final price tag will depend heavily on the size of the bathroom, the chosen finishes, and the level of complexity involved in the renovation. This section will explore the financial implications of various options, allowing for a more informed budgeting process.
The cost of renovating a concrete bathroom can vary significantly depending on several factors. The size of the bathroom is a primary determinant; a larger bathroom will naturally require more materials and labor. The complexity of the design also plays a crucial role; intricate designs or the integration of advanced features will increase costs. Finally, the choice of materials and finishes will greatly impact the overall expense.
High-end materials and specialized labor will command higher prices compared to more economical alternatives.
Material Costs for Concrete Bathroom Finishes
The cost of materials for finishing concrete bathroom walls can vary considerably depending on the chosen method. A basic sealant, for instance, might cost between $20 and $50 per gallon, while high-end epoxy coatings can range from $100 to $300 per gallon. Paints designed for concrete surfaces generally fall within a similar price range to sealants, although the cost will also depend on the quality and coverage of the paint.
Consideration should also be given to the cost of primers, which are often necessary for proper adhesion and to prevent moisture penetration. For example, a mid-range concrete primer might cost around $30-$40 per gallon. Finally, the cost of any additional decorative elements, such as tiles or mosaics, should be factored into the overall budget.
Labor Costs for Concrete Bathroom Renovation
Labor costs represent a significant portion of the overall renovation budget. The cost of labor will vary based on location, the contractor’s experience, and the complexity of the project. A simple sealing job might cost between $500 and $1500, while more complex projects involving extensive surface preparation and specialized finishes could cost upwards of $5000 or more. It’s crucial to obtain multiple quotes from reputable contractors to compare pricing and ensure a fair price for the services.
It’s also advisable to factor in additional labor costs for tasks such as plumbing adjustments or electrical work if required.
Comparison of Concrete Sealants and Paints
Choosing between concrete sealants and paints involves weighing cost, durability, and aesthetic considerations. While sealants primarily protect the concrete from moisture and staining, paints offer both protection and aesthetic appeal. Epoxy sealants, for instance, offer superior durability and water resistance compared to acrylic sealants, but they come at a higher price. Similarly, high-quality concrete paints, such as those designed for high-moisture environments, offer better longevity and resistance to chipping and fading than cheaper alternatives.
The following table summarizes the price differences and other relevant characteristics:
| Finish Type | Approximate Cost per Gallon (USD) | Durability | Maintenance |
|---|---|---|---|
| Acrylic Sealant | $20 – $50 | Moderate (5-7 years) | Re-application every 5-7 years |
| Epoxy Sealant | $100 – $300 | High (10-15 years) | Re-application every 10-15 years |
| Standard Concrete Paint | $30 – $70 | Moderate (3-5 years) | Re-painting every 3-5 years |
| High-Performance Concrete Paint | $50 – $150 | High (7-10 years) | Re-painting every 7-10 years |
Budget Breakdown for Concrete Bathroom Renovation
Creating a detailed budget is crucial for managing the costs of a concrete bathroom renovation. The budget should include all aspects of the project, from materials and labor to permits and unforeseen expenses. A realistic contingency of 10-20% of the total estimated cost should be included to account for unexpected issues that may arise during the renovation. For example, a bathroom renovation project estimated at $10,000 should ideally include a contingency of $1,000 – $2,000.
Example Budget Breakdown (for a medium-sized bathroom):
- Materials (sealant, paint, primer, etc.): $1500 – $3000
- Labor (demolition, surface preparation, finishing): $3000 – $6000
- Plumbing and fixtures (if applicable): $1000 – $3000
- Permits and inspections: $200 – $500
- Contingency (15%): $750 – $1500
Longevity and Maintenance of Concrete Bathroom Finishes
The longevity and maintenance requirements of different concrete finishes vary considerably. Understanding these differences is crucial for making informed decisions and managing long-term costs. For instance, epoxy coatings offer superior durability and require less frequent maintenance compared to standard concrete paints. Regular cleaning and occasional resealing or repainting are essential to maintain the appearance and integrity of the chosen finish.
| Finish | Longevity (Years) | Maintenance | Cost of Maintenance |
|---|---|---|---|
| Epoxy Coating | 10-15 | Occasional cleaning, potential re-sealing after 10-15 years | Low to Moderate |
| Acrylic Sealant | 5-7 | Regular cleaning, re-application every 5-7 years | Moderate |
| High-Quality Concrete Paint | 7-10 | Regular cleaning, repainting every 7-10 years | Moderate |
| Standard Concrete Paint | 3-5 | Regular cleaning, repainting every 3-5 years | High |
Closing Summary
Designing a bathroom with unfinished concrete walls is a journey that blends creativity with practicality. By carefully considering design aesthetics, employing appropriate waterproofing techniques, and strategically integrating plumbing fixtures, the inherent challenges of this material can be overcome to create a truly unique and functional space. From the initial design concept to the final finishing touches, meticulous planning and execution are paramount to achieving a beautiful and durable bathroom that reflects both style and functionality.
Remember, the raw beauty of exposed concrete, when handled correctly, can be a stunning feature, creating a bathroom that stands out from the ordinary.
Answers to Common Questions
Is concrete suitable for all bathroom styles?
While concrete’s industrial aesthetic lends itself well to modern and minimalist designs, its versatility allows for adaptation to various styles with careful material and color choices. Rustic styles can be achieved with warm-toned sealants and natural wood accents, while a contemporary look can be created with sleek fixtures and monochromatic color palettes.
How long does it take to finish concrete bathroom walls?
The timeframe varies significantly depending on the chosen finish (sealing, painting, staining), the size of the bathroom, and the complexity of the project. Simple sealing might take a few days, while more involved processes like painting or applying intricate tilework could extend the project over several weeks.
Can I DIY the finishing of concrete bathroom walls?
While some aspects, such as sealing or painting, can be tackled by DIY enthusiasts with sufficient skill and patience, waterproofing and plumbing integration are best left to experienced professionals to ensure proper functionality and prevent costly water damage.
What are the long-term maintenance requirements of concrete bathroom walls?
Properly sealed and finished concrete walls are relatively low-maintenance. Regular cleaning with mild detergent and water is usually sufficient. However, periodic inspections for cracks or signs of moisture are recommended to address any potential issues promptly.
Leave a Reply